12:10 Evaluated Receipts Settlement
Evaluated Receipts Settlement (ERS) is the term used in PECOS for Self Invoicing or Self Billing. Some suppliers do not always issue invoices and therefore an invoice can be generated internally for accounting and payment purposes. Invoices are automatically generated when receipts are processed.
Within the UK, HMRC (“HM Revenue & Customs”) defines the rules required to operate a self-billing regime between a buyer and a supplier. Failure to do this may mean that the buyer may not be allowed to recover their input tax. The ERS functionality in PECOS ensures that the self-billing process is compliant with HMRC regulations, thereby allowing customers to increase their scope of implementation and leverage the efficiency savings that are derived from approved self-billing agreements.
Receipting Procedure
- Navigate to the Document Search screen and search for the order for which you wish to create a receipt and automated invoice.
- Click on the Receipt icon to open the Receipt Entry screen.
Notice that a message is displayed at the top of the screen warning that the supplier is self billing:
“This is an ERS supplier. Completing the receipt will generate an electronic invoice. Please review that the data is correct before proceeding.”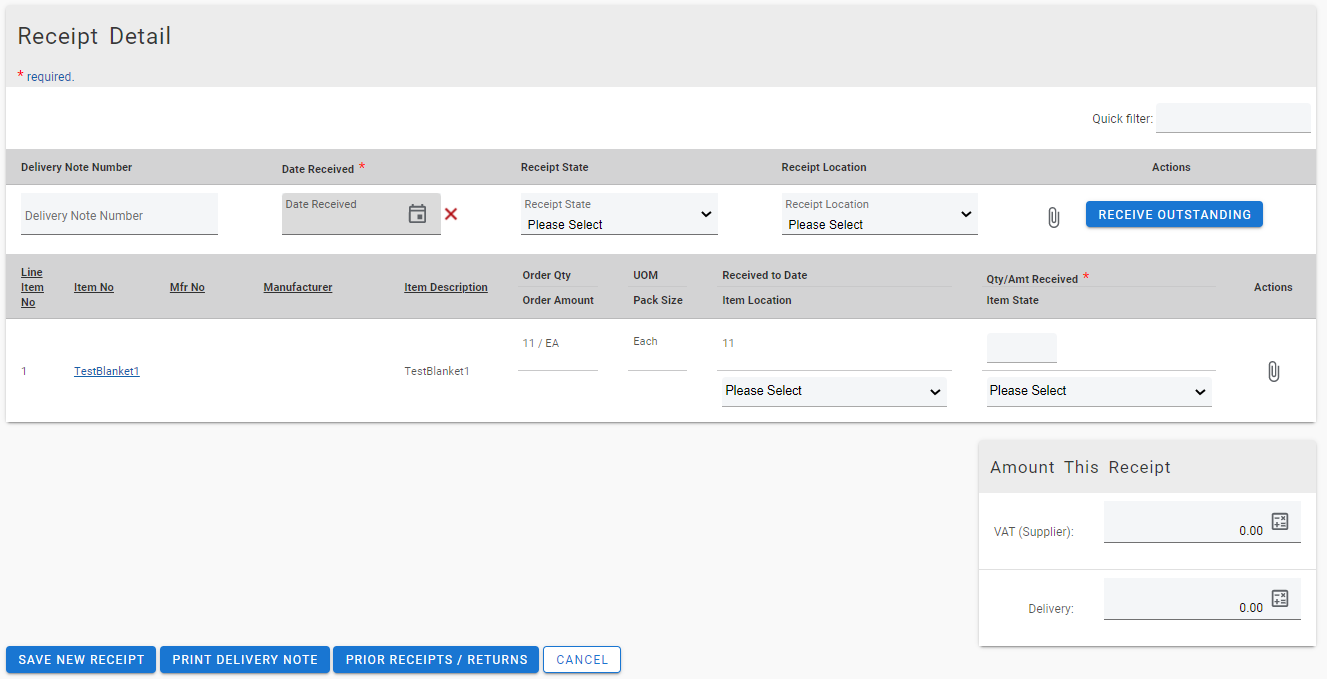
- In the Receipt Detail section enter a value into the Delivery Note Number field. This value is mandatory and will become the invoice number prefix. Note that this number must be unique within each purchase order number. A system generated suffix will form the remainder of the invoice number. For example, if the value 468 is entered, the invoice number will be in the format ‘468-5823’, where 5823 is randomly system allocated.
- Enter a Date Received. The receipt date is mandatory and will become the invoice date.
 Click on the date picker to open the calendar window.
When the Calendar opens it can be incremented and decremented by month and year by clicking on the arrows in the header bar. To select a date, click on it. The calendar will close and the date selected will populate the Date Received field.
 The forward arrow symbol will move the month forwards
 The backward arrow symbol will move the month backward
 The forward circled arrow symbol will move the year forwards
 The backward circled arrow symbol will move the year backwards
Click on the date required to select it. The date will automatically populate the Date field. Use the red delete icon to clear the date if you wish to make a change.
The receipt date will be validated and future dates are not allowed. Enter a date that is either current (i.e. today) or past - Optionally select a Receipt State at header and line level from the list box.
- Optionally select a Receipt Location at header and line level from the list box.
- Select the Receipt Attachments icon to optionally enter receipting comments and attachments.
- Enter quantities or amounts into the ‘Qty/Amt Received’ column for each line. Enter each line value separately and then tab outside the field to update the form and to update and calculate VAT. Note that line item details, unit of measure and prices cannot be updated.
- As quantities are entered the amount of VAT is calculated based on the VAT treatments associated to each order line and will automatically display. This value will appear as the Supplier VAT on the self billed invoice and will be added to the final payment amount. Optionally this VAT value can be overridden. If there is likely to be a rounding difference when the invoice is matched, it is recommended that rather than changing VAT during receipt that a change order is processed to correct the VAT treatments. This will ensure that the VAT summary on the invoice reconciles to the supplier total.
- Optionally enter a Delivery charge of available. This will appear as the delivery amount on the invoice and will be added to the invoice total.(Remember to add an amount to VAT if VAT is chargeable on delivery.)
- Click the Save New Receipt button to save the receipt and create a system generated invoice.
Note that receipts for an Evaluated Receipt Settlement Supplier cannot be edited.
Additional details about self billing and invoicing can be found in the current version of the ‘PECOS P2P Invoicing and Settlement Guide’.