22.2 Buy-for Users
The Buy-for Users sub window enables you to select other PECOS P2P users for the selected user to buy on behalf of. The user will be able to select these Buy-for users in the Requisition delivery and invoicing screen of their shopping basket.
The affect of such a selection is to change the profile of the whole requisition being created to that of the user being bought for (i.e. the Buy-for user):
- The Delivery Name and Address is changed to that of the buy-for user.
- The Billing Address is changed to that of the buy-for user.
- The buy-for users Procurement Cards are made available for use.
- The buy-for user’s Default Accounting overrides that of the requisitioner.
- The requisition will resolve all Approval roles based on the buy-for user’s Approval Rule Group and not the Requisitioner’s. Note that the Approval plans must be appropriately configured.
Note that the primary advantage of allowing a user buy-for rights is to define the appropriate approval routing of the requisition. Subject to the configuration of your approval plans, it will follow the approval route of the buy-for user rather than the requisitioner. Delivery, procurement card and accounting defaults can all be edited irrespective of the granting of buy-for rights.
To assign Buy-for Users and give permission to users whom your user is to buy on behalf of:
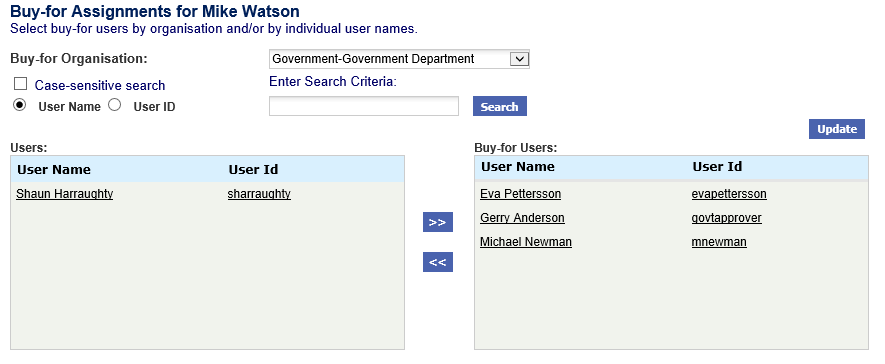
- Click the Buy-for Users button to open the Buy-for Assignments screen.
- Any previously assigned Buy-for Organisation will display in the 'Buy-for Organisation:' list box.
- Any previously assigned Buy-for Users will be displayed in the right hand window. - Specify a Buy For Organisation: If you choose an organisation from this drop-down box, and then click update, the User will have permission to buy for all users within that organisational level.
- If you select an organisation from the drop-down box, the user will have permission to buy on behalf of all users within that organisation. This is a quick way to select multiple users based on an organisation.
- If no organisation permission is required select '-None-' (default). - Specify a User:
- Use the user Search to find users for assignment:
- Select the 'User Name' (default) or 'User ID' radio button to define the type of search to be undertaken.
- If you want your search to be case-sensitive, check the Case-sensitive search box.
- A partial value (used as a wildcard) may be entered to refine the search.
- To see a list of all available users, leave the user text box empty. The first 100 records will be displayed.
- A list of users that match your search criteria will appear in the 'Users' window.
- To assign a user, simply click on the user name and it will be moved to the 'Buy-for Users' window.
- To optionally assign ALL available users, click on the >> (move all) arrows.
- To un-assign a user simply click the user name in the 'Buy-for Users' window. The user will be moved back to the 'Users' window.
- To optionally remove ALL assigned users click on the << (move all) arrows. - When you have finished click the Update button. Navigating out of the Buy-for user screen before clicking the update button will reset the screen and changes will not be saved.