4.9:10 Receipt States and Locations
The States and Locations used by the receipting process can be administered in the Organisation Settings Receipting tab. These labels appear in the respective list boxes for selection in the Receipt Entry screen and are used by the Receipt Workflow as key fields to ensure receipts are routed correctly.
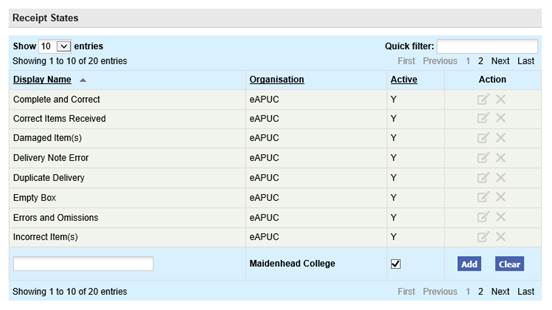
Receipt States
A number of system defined default States are provided. These defaults can optionally be deactivated to suppress them from appearing in the Receipt Entry screen but cannot be deleted. The default States are listed here:
- Complete and Correct
- Correct Item(s) Received
- Damaged Item(s)
- Delivery Note Error
- Duplicate Delivery
- Empty Box
- Errors and Omissions
- Incorrect Item(s)
- Inspection Required
- Missing Item(s)
- No Delivery Note
- Not on Order
- Over Delivered Item(s)
- Quarantined / Bonded
- Received not Checked
- Substitution
It is also possible to add your own bespoke user defined States that may be specific to your organisation. At the foot of the Receipt States table enter the Display Name for the new State and click Add. The new state will automatically be assigned to the logged in administrators organisation and be visible to all users in and below this organisation. A user defined State may be deleted by the organisation that created it, as long as it has not already been assigned to a receipt record.
Search and Filter
The Receipt States table will display 10 entries, sorted alphabetically, by default but can be extended using the Show entries control in the top left hand corner of the table. Using the list box, choose an override to display 25, 50 or 100 entries. When more than one page is available, pagination controls will display the number of pages of entries and allow you to scroll or jump between those pages. A Quick filter provides a 'type ahead' text search, which automatically filters the entries in the table using the string of characters entered.
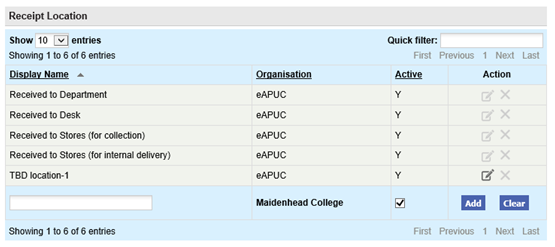
Receipt Locations
A number of system defined default Locations are provided. These defaults can optionally be deactivated to suppress them from appearing in the Receipt Entry screen but cannot be deleted. The default Locations are listed here:
- Received to Department
- Received to Desk
- Received to Stores (for collection)
- Received to Stores (for internal delivery)
It is also possible to add your own bespoke user defined Location that may be specific to your organisation. At the foot of the Receipt Location table enter the Display Name for the new Location and click Add. The new location will automatically be assigned to the logged in administrators organisation and be visible to all users in and below this organisation. A user defined Location may be deleted by the organisation that created it, as long as it has not already been assigned to a receipt record.
Search and Filter
The Receipt Locations table will display 10 entries, sorted alphabetically, by default but can be extended using the Show entries control in the top left hand corner of the table. Using the list box, choose an override to display 25, 50 or 100 entries. When more than one page is available, pagination controls will display the number of pages of entries and allow you to scroll or jump between those pages. A Quick filter provides a 'type ahead' text search, which automatically filters the entries in the table using the string of characters entered.